

View All Products

Get a sample kit
Samples Now
View More


Search

Cart

2025/08/18
How to Make Custom Mylar Bags: Manufacturing Process & Step-by-Step Guide
Tag:
Share:


Custom Mylar bags are manufactured through a sequence of specification, artwork preparation, printing, lamination, converting, inspection, and packing stages. For a buyer, the important part is not simply knowing that a pouch gets printed and sealed—it is understanding which decisions must be finalized before each production stage begins.
Bag style, dimensions, material structure, artwork, printing method, finish, zipper, valve, tear notch, and other features can all affect how the finished pouch is manufactured.
This guide follows the process from the initial packaging requirements through the finished custom bags, so you can prepare a production-ready project and communicate more effectively with your packaging manufacturer.
How Custom Mylar Bags Are Made: Process Overview
Although the exact workflow depends on the pouch specification and printing process, custom Mylar bag production generally follows this sequence:
| Stage | What Happens | What the Buyer Should Confirm |
|---|---|---|
| 1. Specifications | Product and packaging requirements are defined | Size, pouch style, use case, and features |
| 2. Material & Format | Pouch construction is selected | Structure, finish, closure, and functional requirements |
| 3. Artwork | Graphics are prepared on the correct dieline | Layout, text, barcode, and required product information |
| 4. Print Setup | Printing process is prepared | Printing method and production artwork |
| 5. Proofing | Pre-production artwork is reviewed | Text, positioning, dimensions, and visual details |
| 6. Printing & Lamination | Graphics are printed and required films are combined | Approved artwork and material specification |
| 7. Converting | Film is slit and converted into finished pouches | Bag dimensions and features |
| 8. Inspection | Finished production is checked against requirements | Agreed quality criteria |
| 9. Packing & Delivery | Finished bags are packed for shipment | Quantity, packing, and delivery requirements |
The earlier these decisions are finalized, the less likely a project is to require avoidable revisions once production preparation has started.
Step 1: Define Your Packaging Requirements
Manufacturing starts with the product—not with the artwork.
Before choosing a material or sending a design file, define what the pouch needs to do. The manufacturer needs enough information to determine an appropriate bag format, structure, and production setup.
Start with the following questions:
What product will go inside the pouch?
A dry snack, coffee product, powder, cosmetic product, or another application may place different demands on the package.
How much product will each pouch contain?
Do not choose dimensions from nominal capacity alone. The product's shape, density, and required headspace can influence the finished pouch dimensions.
How will the package be displayed?
A stand-up pouch may suit products intended to sit upright on a shelf, while a flat pouch or gusseted format may make more sense for another filling or display method.
How will customers open and close it?
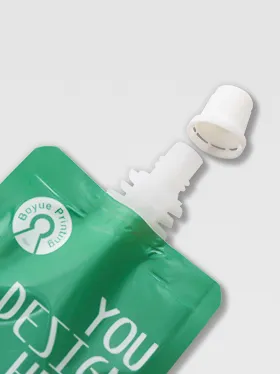
Possible features include zippers, tear notches, hang holes, valves, and spouts, depending on the pouch and application.
How will the pouch be filled and sealed?
Packaging designed for manual filling may require a different production specification from packaging intended for an automated packing line.
At this stage, create one specification sheet covering the pouch style, finished dimensions, product application, intended fill, closure, functional features, surface finish, and artwork requirements.
That specification becomes the reference point for the stages that follow.
Step 2: Choose the Bag Style and Material Structure
Custom Mylar packaging commonly uses laminated flexible materials rather than one universal film construction. The manufacturing question is therefore not simply “Which Mylar material should I choose?” but what structure is appropriate for the product, pouch format, and production requirements.
Different layers can perform different functions. Depending on the specification, a construction may need an outer printable surface, one or more functional layers, and an inner layer suitable for sealing.
The exact construction should be selected according to requirements such as:
- required product protection;
- opacity or product visibility;
- pouch stiffness and handling;
- printing and finish requirements;
- sealing requirements;
- filling conditions; and
- any applicable packaging requirements for the intended market.
This is also the point to finalize the physical pouch format.
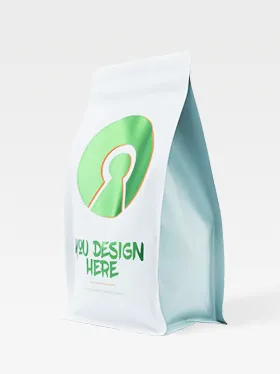
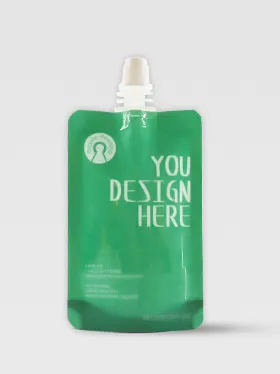
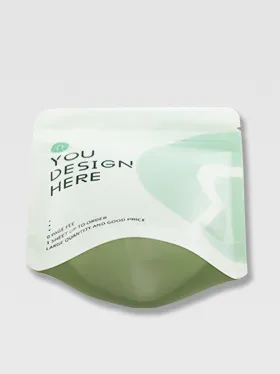
Common options include stand-up pouches, flat pouches, side-gusset formats, flat-bottom formats, spouted pouches, and custom-shaped bags. Features such as resealable zippers, tear notches, hang holes, and valves should be specified before production because they affect the converting stage.
Avoid selecting a material solely because another brand uses it. Two packages that look similar on a shelf may have different filling, protection, sealing, or distribution requirements.
Step 3: Prepare the Artwork and Dieline
Once the pouch dimensions and format are established, the design needs to be translated into production artwork.
The dieline is the structural template used to position artwork relative to the finished package. It identifies areas such as the pouch panels, cut boundaries, seals, folds, and other production-dependent locations.
Build the artwork on the dieline supplied or approved for the actual pouch specification rather than designing on an arbitrary rectangle and adapting it later.
Before submitting artwork, check:
Panel orientation.
Confirm which areas become the front, back, bottom, or gussets after the pouch is formed.
Important content placement.
Keep logos, small text, barcodes, and other critical elements away from areas that may be affected by seals, cuts, folds, or installed features.
Bleed and edge artwork.
Backgrounds and graphics intended to reach a finished edge need to follow the production template.
Feature locations.
A zipper, tear notch, valve, hang hole, or other feature can change the usable artwork area.
Text and product information.
Proofread the actual production file. Packaging errors become much more expensive to correct after printing begins.
Boyue's current product workflow supports artwork uploads including AI, PDF, and PSD files.
If you have not finalized your pouch format yet, choose the product specification before treating the artwork as production-ready.
Step 4: Choose the Printing Method
The printing process determines how the approved graphics are transferred to the packaging film.
Boyue's current custom-pouch information lists both digital and gravure printing as available production options, with digital suited to flexible small-batch requirements and gravure worth evaluating for larger production runs.
Digital Printing
Digital printing does not require conventional printing cylinders or plates for each graphic in the same way an analog process does. This makes it useful when flexibility is important, particularly for smaller runs, multiple designs, test launches, or artwork that changes frequently.
Gravure Printing
Gravure production uses engraved cylinders to transfer the printed image. The additional setup can make it better suited to larger, more stable production programs where the setup can be distributed across a greater quantity.
Which printing method should you choose?
Do not choose on print appearance alone. Evaluate:
| Decision Factor | Digital Printing | Gravure Printing |
|---|---|---|
| Smaller production runs | Often a strong fit | Setup may be less attractive |
| Multiple SKUs/designs | Flexible | Requires more production planning |
| Frequent artwork changes | Flexible | New artwork may require new setup |
| Larger repeat runs | Evaluate total economics | Often worth evaluating |
| Prepress requirement | Digital setup | Cylinder preparation required |
The best manufacturing setup depends on quantity, number of SKUs, artwork, material, repeat-order expectations, and project economics.
Step 5: Review and Approve the Proof
Proof approval is the final opportunity to catch many artwork problems before production proceeds.
A digital proof can help confirm layout, text, orientation, and positioning. A physical sample can provide additional information about the actual pouch, but whether one is necessary should depend on the project and what needs to be validated.
When reviewing a proof, check more than the front-panel appearance.
Confirm:
- final pouch dimensions;
- front/back orientation;
- logo and artwork positioning;
- spelling and product information;
- barcode placement and readability requirements;
- zipper, valve, tear-notch, or hang-hole locations;
- seals and folds relative to the artwork;
- surface-finish placement where applicable; and
- that the approved version is the correct SKU.
Do not approve a proof while known artwork questions remain unresolved.
A common production mistake is approving the visual design while assuming the manufacturer will later correct small content or positioning problems. Treat proof approval as a manufacturing checkpoint, not merely a design review.
Step 6: Printing, Lamination and Curing
After the specifications and artwork are approved, the project moves into manufacturing.
Printing
The approved graphics are first reproduced on the specified printable film using the selected printing process.
At this point, artwork changes are no longer equivalent to editing a design file during the concept stage. Depending on the printing method and production status, a change can require production setup to be repeated.
This is why specification and proof approval belong before printing.
Lamination
For a laminated pouch construction, the printed film is combined with the other specified film or material layers.
Lamination allows the finished package to combine functions that one layer alone may not provide. The construction is selected for the particular package rather than treating every custom Mylar bag as having the same fixed layer combination.
Curing
Where the selected lamination system requires curing, the laminated material is held for the necessary period so the bond between layers can develop before the film moves into slitting and bag making.
The required curing conditions depend on the actual material and lamination system, so a universal curing time should not be assumed.
Step 7: Slitting and Bag Making
After the laminated material is ready for converting, the production web must be prepared for the required pouch dimensions and format.
Slitting
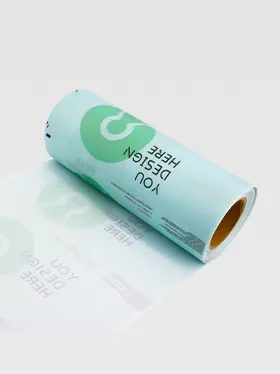
Printed and laminated flexible packaging is produced in web form. Slitting divides that material into the widths required for subsequent converting.
This stage connects the printed roll to the physical geometry of the finished package.
Bag Making
The slit material is then converted into the specified pouch.
Depending on the format, bag making can include operations such as folding, forming, sealing, and cutting. Specified functional components or features are incorporated according to the pouch design.
For example, the converting setup can differ between a stand-up pouch, a flat pouch, and a custom die-cut format. A zipper or other specified feature must also align with the approved bag dimensions and artwork.
This is one reason pouch structure, dimensions, and features should be finalized before artwork approval: those decisions ultimately determine how the printed web has to be converted.
Step 8: Quality Inspection
Inspection should compare finished production against the agreed specification rather than relying only on whether the bags look acceptable at first glance.
Relevant checks depend on the project, but buyers should establish which characteristics need to be reviewed before mass production begins.
Typical inspection points can include:
Print and artwork:
Is the correct design being produced? Is registration and visual output acceptable against the approved reference?
Dimensions and converting:
Does the finished pouch match the approved size and format?
Seals:
Are seals formed consistently for the specified construction and pouch design?
Features:
Are zippers, tear notches, valves, hang holes, or other specified components positioned and functioning as intended?
Appearance:
Are there obvious converting, surface, or printing defects that fall outside the agreed acceptance criteria?
For a buyer, the practical lesson is simple: define critical requirements before manufacturing so inspection has a clear specification against which to evaluate the finished packaging.
Step 9: Packing and Delivery
After production has passed the required inspection stage, finished pouches are counted, packed, and prepared for delivery.
Before the order ships, confirm:
- finished quantity and SKU breakdown;
- how individual SKUs are identified;
- packing configuration;
- destination and shipping information; and
- any receiving requirements relevant to your operation.
Delivery planning should also be separated from manufacturing time when scheduling a launch. Production duration and transit duration are affected by different variables, so avoid building a launch calendar around an assumed universal turnaround.
For repeat orders, keeping the final approved specification and artwork organized can also simplify communication when the same pouch needs to be produced again.
How to Choose the Right Manufacturing Setup for Your Order
There is no single production setup that is best for every custom Mylar bag.
Evaluate the relationship between quantity, SKU count, material, printing process, pouch format, and repeat-order plans.
A smaller launch involving several designs may place more value on printing flexibility. A mature product with stable artwork and larger recurring quantities may justify a different production approach.
Before choosing a production route, confirm:
- whether the supplier can manufacture the pouch format and features you need;
- which printing method is appropriate for the order structure;
- how the material construction will be specified;
- what happens during dieline, artwork, and proof approval;
- which requirements will be checked during production; and
- how approved specifications and artwork will be managed for repeat orders.
Boyue's current custom-pouch catalog provides online configuration for pouch size, material, printing, finish, and features, and supports both digital and gravure production.
Common Mistakes to Avoid Before Production
Many packaging problems begin before the printing press starts.
Designing before the pouch specification is final.
Changing dimensions, zipper position, or pouch format later can force the artwork to be rebuilt.
Choosing material by appearance alone.
A metallic, clear, or paper-look package still needs to meet the functional requirements of the product and filling process.
Ignoring the dieline.
Artwork that looks correct on a flat screen may interact differently with seals, folds, and gussets after converting.
Treating all printing methods as interchangeable.
Quantity, SKU count, and repeat-order plans should influence the manufacturing method.
Approving only the front panel.
Check every panel, text element, and feature location before production.
Changing artwork after approval.
Use clear version control so everyone is working from the same approved production file.
Leaving critical requirements until inspection.
Quality control cannot compensate for a requirement that was never clearly specified.
Planning around an assumed lead time.
Production complexity and logistics vary. Confirm the actual schedule for the actual specification rather than relying on a generic number.
Frequently Asked Questions
How are custom Mylar bags manufactured?
Custom Mylar bags generally move from packaging specifications and artwork preparation through print setup, printing, lamination, curing where required, slitting, bag making, inspection, packing, and delivery. The exact sequence varies according to the printing method, material construction, pouch format, and features.
How long does custom Mylar bag production take?
There is no reliable universal production time. Timing depends on factors including the printing method, material, pouch format, quantity, SKU count, proofing requirements, and production schedule. Confirm the current production estimate against the final specification before planning a launch.
What files are needed to manufacture custom Mylar bags?
The artwork needs to be prepared against the correct production dieline. Boyue's current product workflow lists AI, PDF, and PSD among supported artwork upload formats. The final file should follow the requirements supplied for the specific pouch and printing process.
Which printing method is best for custom Mylar bags?
It depends on the order. Digital printing is useful when flexibility, smaller quantities, or multiple designs are important, while gravure is worth evaluating for larger, stable production programs. Boyue currently lists both digital and gravure printing for custom pouches.
Can multiple designs or SKUs be produced in one order?
Boyue's current custom-pouch page supports flexible multi-SKU ordering and indicates that multiple pouch designs or product variations can be produced within a production plan. The exact configuration should still be confirmed for the selected product and printing method.
Do I need a physical sample before mass production?
Not necessarily for every project. A digital proof is useful for checking production artwork, while a physical sample may be appropriate when you need to evaluate aspects that cannot be judged adequately from a screen. Decide what needs to be validated before production and select the proofing route accordingly.
Start Your Custom Mylar Bag Project
A production-ready Mylar bag project starts with clear specifications.
Prepare the product application, pouch format, dimensions, material requirements, artwork, quantity, and required features before moving into manufacturing.
When you are ready to compare pouch formats, materials, printing options, finishes, and features, explore Boyue's verified Custom Pouches catalog. If your project requires a shaped pouch, you can also review the custom die-cut Mylar bag option.
These product pages provide the appropriate next step for moving from manufacturing research into product configuration without relying on an unverified quote destination.
Share:
Recommended article
Explore Custom Packaging
Premium quality, low MOQ, and fast turnaround for brands of all sizes.
Custom Pouches
Custom Stickers & Labels
Custom Boxes
Custom Cards
Cannabis Packaging
Stationery Series


Not Sure What To Choose?
Skip the calculator. Our packaging team is here to guide you.

Talk to an Expert

Start your custom packaging today
Get Instant Quote
Need help? Talk to a packaging expert